• This forum is the machine-generated translation of www.cad3d.it/forum1 - the Italian design community. Several terms are not translated correctly.

infill pattern - how to create emptying honeycomb inside thickness round tube?

  • Thread starter Thread starter reggio
  • Start date Start date

reggio

Guest
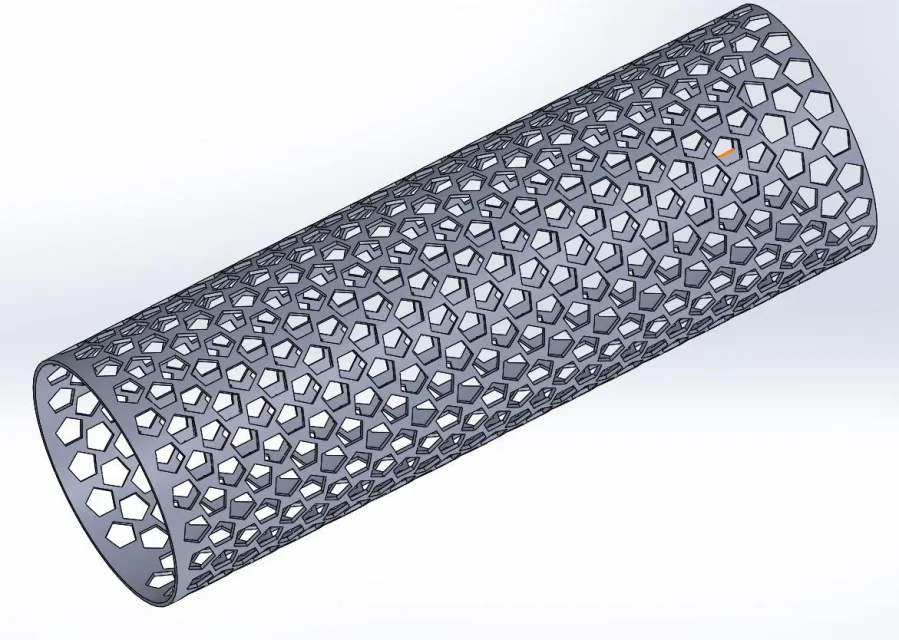
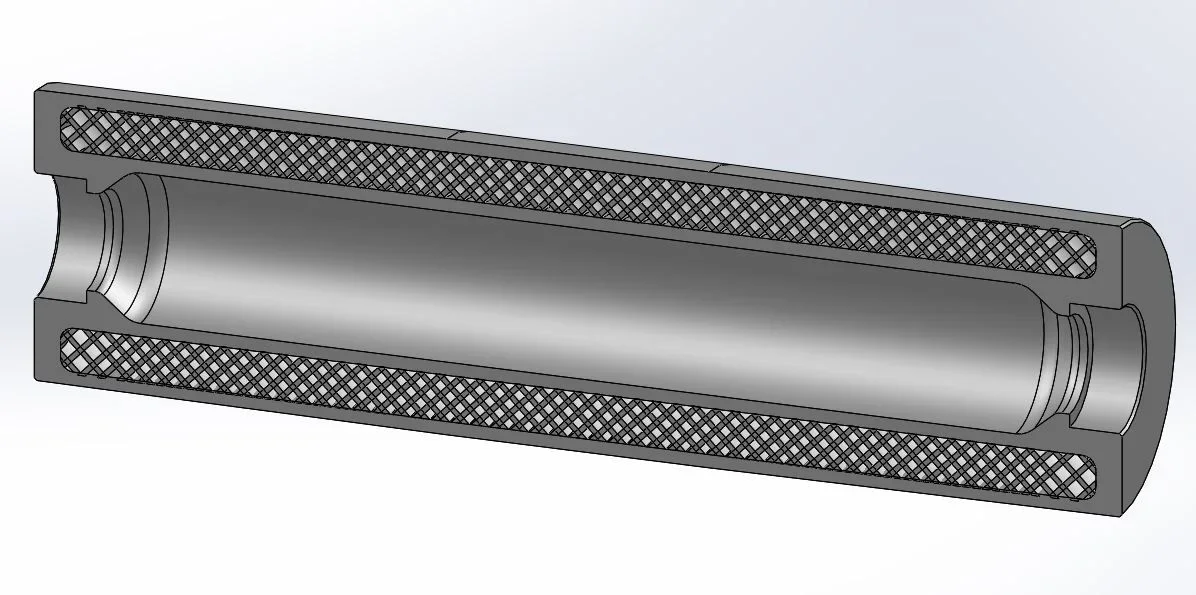
hi, I would like to lighten a round tube worked with a uninfill pattern - that is an emptying of honeycomb or zig-zag or "s", in short crossed, to lighten but maintain resistance ...

Would you suggest me how to do that? what approach to use?
1605470818150.webp1605470909824.webp1605471020524.webp
 
Passing cut?
if you already have a ready plot you can try with the winding function, otherwise use a linear repetition of 2/3 files
 
Passing cut?
if you already have a ready plot you can try with the winding function, otherwise use a linear repetition of 2/3 files
hi massive, if it were a parallelepiped I could, but I want to lighten a round tube, (actually cone + cylinder + cone tape) to make a 3d printing.

I would like to keep the external and internal surfaces full for a certain thickness, while the inside lighten it while maintaining a homogeneous circular reticle to give it rigidity along all x,y,z axes...

But I still don't know how this "round plot" could be.. and then how to draw it...

suggestions? ... uhmmm maybe I will try to empty + draw a reticle in section and then use a revolution...?1605518389012.png
 
I would like to keep the external and internal surfaces full for a certain thickness, while the inside lighten it while maintaining a homogeneous circular reticle to give it rigidity along all x,y,z axes...
ehhh? ? ?
If it were a parallelepiped I could, but I want to lighten a round tube,
winding function or circular repeat+linear


You should know that a practical example is worth more than a thousand descriptions. . .
 
But why do you want to shape the infill? That's a slicer function.
the 3d model make it full and then in the slicer decide how much and what type of filling apply.
 
already, I could have gotten there:cautious:

But you don't have great pattern possibilities.
 
But you don't have great pattern possibilities.
... already, indeed,

How did you do that?
If I leave the internal excavation and maybe I give it "until off-set surface" (only I have "superfici"I don't know if I select more surfaces) I probably struggled and looked better...

is likely your method and/or surface knowledge could help
 
I did the pattern the first 2 lines on a flat sketch and then wrapped it with engraving, so I made a linear repetition.
Unfortunately a heavy part comes out, but perhaps it is better
 

Attachments

for 3d printing drawings full piece and ribs choose them from the slicer program as filling.
 
for 3d printing drawings full piece and ribs choose them from the slicer program as filling.
It's just that the slicers I tried, they make you the "everything equal", it's hard to go to put more thickness in some points and less in others or to jam the lattice where you pushed and limit in other points, so I wanted to reticulate by hand, then I will use 100% filling of the molded.
 
solved so for now...
in the examples placed at post 1, the blank part of the pattern develops along the z axis of the printer, so the vacuum continues continuously throughout the height. in the image tube the empty part develops along the circumference: the result obtained, if similar, is not equal to the purpose of the printing.

free slic3r software should already do something similar, increasing the filling percentage in desired areas
 

Forum statistics

Threads
44,997
Messages
339,767
Members
4
Latest member
ibt

Members online

No members online now.
Back
Top