MassiVonWeizen
Guest
being still a student, I'd go slowly with criticism because you still don't have the knowledge to judge, otherwise that design would have understood. being graduates does not mean knowing how to drawabsurd above all the fact that the person who made these drawings has graduated in architecture
I modeled it with solidworks that I don't know how to use 3d autocad and I look good at it...
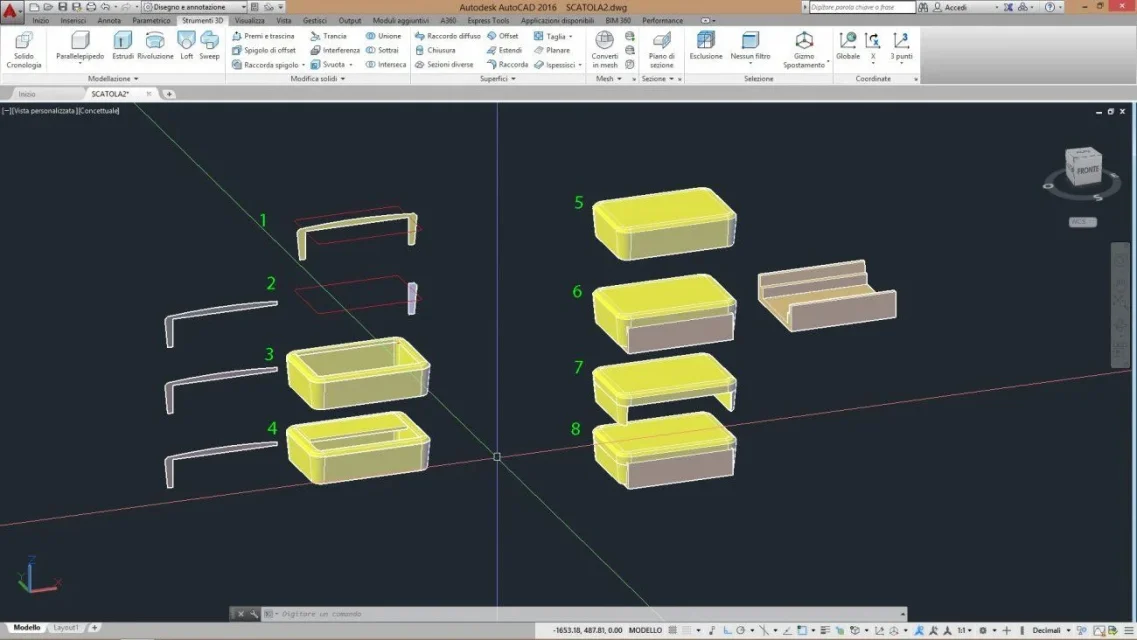
follow the advice of tristus or seek on the net on how to make revolutions of material and rivolutions of cutting because I did so precisely, a revolution in a sense adding material and a revolution of cutting in the perpendicular sense.
the work from whom was commissioned?