• This forum is the machine-generated translation of www.cad3d.it/forum1 - the Italian design community. Several terms are not translated correctly.

vectorize an image

  • Thread starter Thread starter Stigness
  • Start date Start date

Stigness

Guest
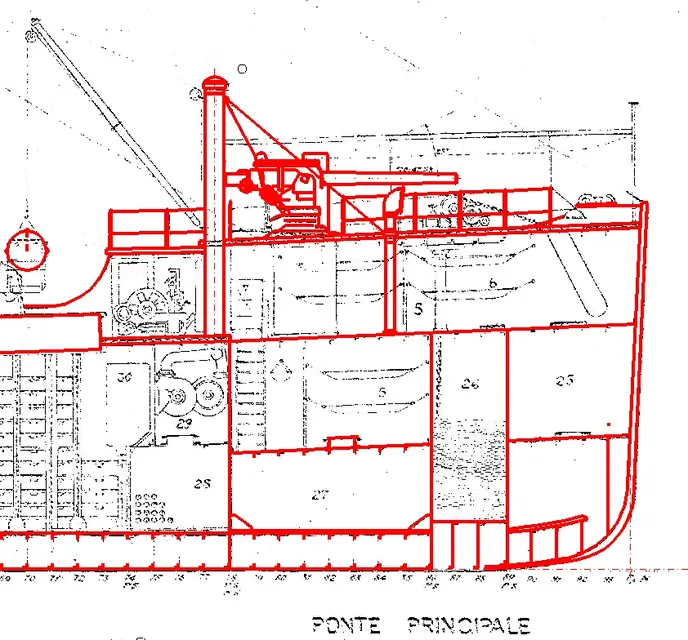
Hey, everybody, I'd need a hand. In practice, I need to digitize existing mechanical components. I wondered (and therefore I ask you :-) if, given the particularity of the forms I have to go to realize, there is a method to bring these parts back without drawing them manually (expensive). I have heard about vectorization, you know how to tell me if acad himself (2012) manages to do something like that or if there is any other program (very user friendly :-) ) that I can use?
 
little use according to me, for the programs in question, especially for that free.
they return only spline that then are almost useless in the mechanical design.
I prefer to shine.
 
in my opinion, for the programmes in question, special for that free.
they return only spline that then are almost useless in the mechanical design.
I prefer to shine.
Unfortunately it is so. :frown:
in the mechanical design, given the precision required, I imagine they are useless.
 
thank you all for the answers. Fortunately I can afford not indifferent tolerances (2-2.5mm) given the nature of the components I have to draw.
Excuse ignorance, can you explain to me what you mean by the term "glocidate"?
 
thank you all for the answers. Fortunately I can afford not indifferent tolerances (2-2.5mm) given the nature of the components I have to draw.
Excuse ignorance, can you explain to me what you mean by the term "glocidate"?
It is the operation that made our "old" (including us) "to pass" to china on a sheet of paper called "lucid", the original design so that we can reproduce it. here for example used ammonia reproductive machines.
Today it is about uploading as a background, an image and "passing" it with the tools of the cad.
it is necessary to correctly position and scale the image and, using as much as possible the original quotas, to revert the drawing. logically it is an operation that still implies errors and imperfections. can go well in case of drawings of maximum as in our case can be a "general plan", a "area arrangement" or similar things.
if it is mechanical details, 2.5mm are a not indifferent quantity. I prefer to draw from scratch anyway.
 
:smile: Unbelievable as some techniques have lost track, even to make its name incomprehensible.

I still have lucids, with which I make my son "lucid" the maps that ask him at middle school. .
 
if it is mechanical details, 2.5mm are a not indifferent quantity.
Currently I find myself drawing parts for agricultural equipment for the earth movement, the tolerances are so "generous" because the holes for embluating the parts are oversized.

I do not want, in practice, I also "glossed", in the sense that I photograph a component with a reference scale, and then import it with the cad by passing the edges :-)
 
attention that the photographic objectives introduce deformations (prospects combined with those proper to the objective) that are difficult to accommodate.
If you want to have proof, behind your pieces, before the photo, put a piece of paper millimeter.
imported into the program the photo, try rebuilding the lines of the millimeter paper, and you will realize that you can't keep in line either of the lines.
quoto.
to make a verification, try to take with the caliber a diameter after you have drawn it with this method.
Currently I find myself drawing parts for agricultural equipment for the earth movement, the tolerances are so "generous" because the holes for embluating the parts are oversized.

I do not want, in practice, I also "glossed", in the sense that I photograph a component with a reference scale, and then import it with the cad by passing the edges :-)
holes will be dimensioned according to the effort to which bolts are subjected.
"wrong" by defect a diameter of 2.5 mm on a pin, is a risk that you do not want to run.
 
attention that the photographic objectives introduce deformations (prospects combined with those proper to the objective) that are difficult to accommodate.
If you want to have proof, behind your pieces, before the photo, put a piece of paper millimeter.
imported into the program the photo, try rebuilding the lines of the millimeter paper, and you will realize that you can't keep in line either of the lines.
I wasn't aware of these deformations. . thanks for the precious advice!
 
I'll give you an example of polishing. as you can see it is silent of a design for which a "mechanical" accuracy is not required, so the method can be accepted.
Once you're done retracing, you disconnect the image and you're still cad.
 

Attachments

  • 29-08-2012 11-20-20.webp
    29-08-2012 11-20-20.webp
    99.9 KB · Views: 13

Forum statistics

Threads
44,997
Messages
339,767
Members
4
Latest member
ibt

Members online

No members online now.
Back
Top