• This forum is the machine-generated translation of www.cad3d.it/forum1 - the Italian design community. Several terms are not translated correctly.

welded joint position representation

  • Thread starter Thread starter mir
  • Start date Start date

mir

Guest
Hi.
I have an unsealed pip assembly (with different positions) in a pluto welded assembly ... and a general mesh assembly which in turn contains the pluto assembling.

If in the general axieme mouse I want to create a position I find the positions of the axieme pippo written in blue and not activateable.

Why is it?

thanks for the help
 
the problem is the welded axieme, which does not allow position representations. or better, even if pluto was a standard set you could not act directly on a pipe; If you try to put pips inside duckoga (standard) you will see the always blue position representations, you have to do the representations in duckoga: After, connect the position 313 of duckoga to 313 of pop and mouse select the 313 of duckoga... but with the welded axieme you rub the "fall" of representations.

Young marble word. :tongue:
 
blue... balls... and turning a welded assembly into normal is not possible if I remember well... .
 
No, but you can put the welded axieme into a hidden container set and turn around the problem... (me you have to do cascading performances)

edit - addition -

this to have a good management of position representations, of course. otherwise you can open the subaxieme, change representation and return to the main aid, but in my opinion, by experience, the effort to do things well is well spent and saved from pastries.
 
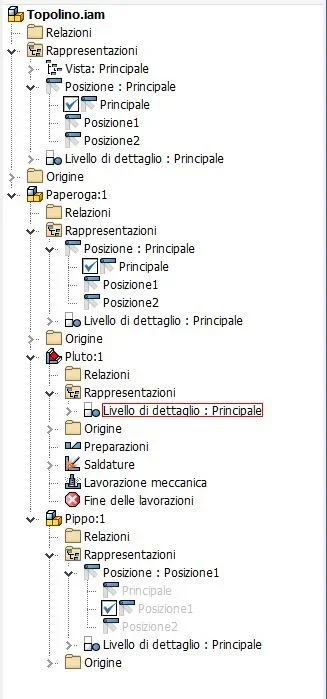
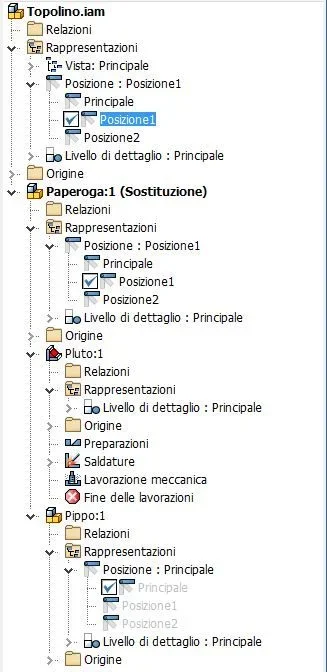
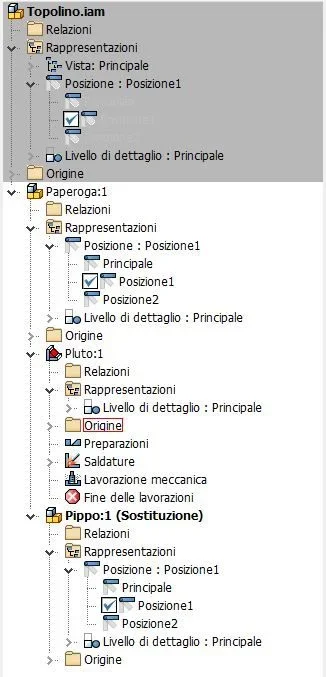
This is what I would do:
position1 and 2 in the mouse
creo duckoga
in paperoga I insert pluto
pluto _non_ contains pipe
insert in latch and pluto bond
in duckoga creo position1 and 2
I collect position1 and 2 of duckoga to those of pop, those of mouse to those of duckoga
boring but eficientTopolino 1.webpTopolino 2.webpTopolino 3.webp
 
blue... balls... and turning a welded assembly into normal is not possible if I remember well... .
It's not impossible.
attention must be paid, there must be no work done in the environment of "mechanical processing " or " welding ", you lose the possible putting into the table ( almost always ), but it is not impossible.
 
It's not impossible.
attention must be paid, there must be no work done in the environment of "mechanical processing " or " welding ", you lose the possible putting into the table ( almost always ), but it is not impossible.
Really? I have no work in the welds and not even boards so I don't risk anything... but how do you do it?
 
Really? I have no work in the welds and not even boards so I don't risk anything... but how do you do it?
It's a tention.

0 ) you do not have to have any other open files.
1 ) creates a new iam.
2 ) insert the welded into the new iam.
3 ) expand the working tree.
4 ) select the components inside the welded (the elements placed in series can create problems ) and drag them outside the welded iam.
5 ) in the new iam you will have the components before pertinence of the welded iam and the same welded but empty iam.
6 ) cancels, without saving, the welded iam.
7 ) saves the file with a name not identical to the welded iam deleted.
8 ) voilà.
9 ) open the new iam, check the constraints so that you are sure that everything is okay.
10 ) if everything is ok, save with the correct name.
11 ) attention : if the old welded iam has been inserted into other assemblies, using the new one, the constraints may be lost.
12 ) removing the template template template from the template folder could be a great deal, so you avoid leaving with a mounting set and then realize that it is all nice nailed (already done, so you have to invent the procedure described )
13 ) handle carefully, I don't want to have ears whistling.

14 ) Bye.
 

Forum statistics

Threads
44,997
Messages
339,767
Members
4
Latest member
ibt

Members online

No members online now.
Back
Top